In the past days, we were discussing about creating ASP.NET Web Services. You can read that article here. In this article, we will go over consuming a web service from a client application.
Let’s try to consume the web service which we have created in the previous article. Follow the below steps for this.
Step 1
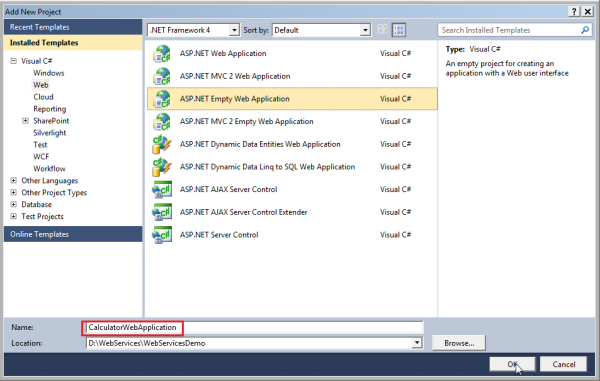
Right click on WebServicesDemo solution in Solution Explorer and add a new ASP.NET Web Application Project and name it as CalculatorWebApplication.

Step 2
Now we need to add a reference to the web service. To achieve this, first right click on the References folder in the CalculatorWebApplication project and select Add Service Reference option.

Then in the Address textbox of the Add Service Reference window, type the web service address and click on GO button. In the Namespace textbox, type CalculatorService and click OK.

Once we click OK, Visual Studio will create a Proxy Class based on the WSDL document. Under the Service References folder, we can see the Namespace we have provided which is CalculatorService.

If you want to look at the generated Proxy Class, first click on the Show All Files button on the top. Then you can see a file named Reference.cs.

Open that file. You can see a class called CalculatorWebServiceSoapClient. This is the Proxy Class. Inside this class, you can see an Add method which is very much similar to the Add method in the CalculatorWebService.

Step 3
Right click on CalculatorWebApplication project in Solution Explorer and add a new Web Form named WebForm1.aspx.
Step 4
Copy and paste the following HTML into the Web Form.
<table style="font-family: Arial">
<tr>
    <td>
        <b>First Number</b>
    </td>
    <td>
        <asp:TextBox ID="txtFirstNumber" runat="server"></asp:TextBox>
    </td>
</tr>
<tr>
    <td>
        <b>Second Number</b>
    </td>
    <td>
        <asp:TextBox ID="txtSecondNumber" runat="server"></asp:TextBox>
    </td>
</tr>
<tr>
    <td>
        <b>Result</b>
    </td>
    <td>
        <asp:Label ID="lblResult" runat="server"></asp:Label>
    </td>
</tr>
<tr>
    <td colspan="2″>
        <asp:Button ID="btnAdd" runat="server" Text="Add"
        OnClick="btnAdd_Click" />
    </td>
</tr>
</table>
Step 5
Copy and paste the following code to the button click event in the code behind file.
protected void btnAdd_Click(object sender, EventArgs e)
{
CalculatorService.CalculatorWebServiceSoapClient client =
               new CalculatorService.CalculatorWebServiceSoapClient();
int result = client.Add(Convert.ToInt32(txtFirstNumber.Text),
                Convert.ToInt32(txtSecondNumber.Text));
lblResult.Text = result.ToString();
}
Now right click on the WebForm1.aspx and select View in Browser. Give some First Number & Second Number, say 20 and 30 and click on Add button. You will get a result as 50 as expected.

Here, if we look at the web application, we don’t have the logic of adding two numbers. The addition is actually done by the web service. The client application accesses the web service using HTTP protocol. Messages with web services are exchanged in SOAP format. The Serialization which is converting .NET types to SOAP request messages and Deserialization which is converting SOAP response back into .NET types are done by Proxy Class which in our case is CalculatorWebServiceSoapClient class.
Reference
Arun Ramachandran (http://BestTEchnologyBlog.Com)
